
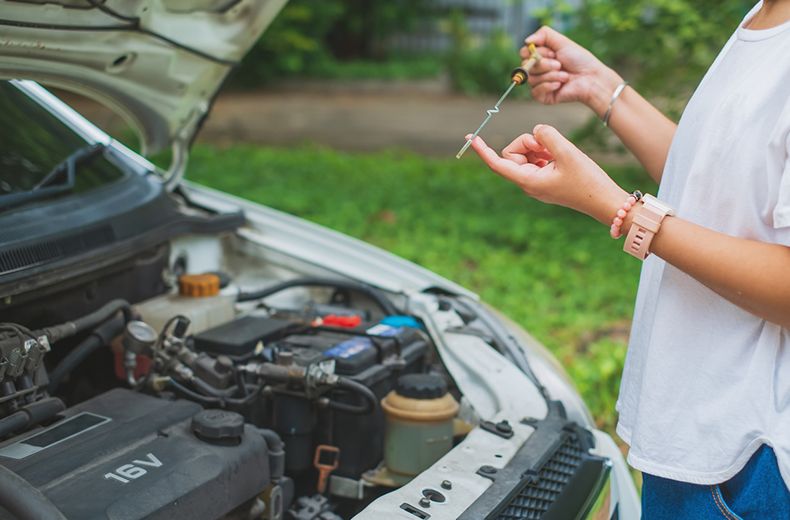
Owning a car is a journey that can be both fun and tiring. You can enjoy the freedom of driving and maintaining your car. While the engine itself may seem like the heart of your car, the fluids inside it are essential to keeping it alive. For new car owners, knowing how to perform a basic fluid check is an essential skill that will keep your car running smoothly and prevent problems. This guide is very detailed and will show you the most important things you need to know about your car and how you can carry out simple checks yourself to keep it in good condition.
Important Fluids in Your Car:
Before we do our own inspection, let’s take a look at the fluids that are important to the operation of your car:
- Engine Oil: Prevents different parts of the engine from rubbing against each other and generating heat.
- Transmission Fluid: With an automatic transmission, transmission fluid makes shifting easier. In a manual transmission, transmission fluid cools and lubricates the moving parts.
- Coolant or Antifreeze: Prevents the engine from getting too hot or too cold by regulating the temperature.
- Brake Fluid: Brake fluid transfers the force from the brake pedal to the braking components, bringing the car to a safe stop.
- Power Steering Fluid: Power steering fluid helps you steer by transferring power from the steering pump to the steering rack.
- Glass Cleaning Fluid: This keeps the glass clean so you can see clearly.
Essential Tools for DIY Fluid Checks:
Before you start your own fluid test, you should have the following tools on hand:
- Disposable Gloves: Wearing disposable gloves can prevent your hands from getting wet.
- Paper Towels or Rags: You can use paper towels or rags to clean up spills and wipe the dipstick.
- Funnel: Helps pour liquids without spilling.
- User Guide: This document provides useful details on where and how to use fluids.
Now let’s go through the steps of checking each major fluid.
Check the Engine Oil:
Step 1: Park the Car on a Level Surface
To let the oil settle, park the car on a level surface and let it sit for at least a few minutes.
Step 2: Locate the Dipstick
The engine oil dipstick is usually labeled and located close to the engine. If you are unsure, please refer to the owner’s instructions.
Step 3: Remove the Dipstick and Dust It Off
First, take out the dipstick and wipe it clean with a cloth. Then put it back and check the oil level again.
Step 4: Check the Oil Level
The lines on the dipstick indicate how much oil should be in the engine. Make sure the oil level is between the minimum and maximum marks.
Step 5: Look at Crude Oil
Check the color of the oil. If your engine oil is dirty or dark, this could be a sign that you need to change it. Clean oil is yellow.
Check Transmission Oil:
Step 1: Start the Car
If your car is self-driving, the engine must be in park or neutral. When using the manual transmission, the engine must be switched off.
Step 2: Locate the Transmission Dipstick
The transmission dipstick is usually recognizable and located close to the engine. Consult your vehicle’s owner’s manual for assistance.
Step 3: Remove the Dipstick and Dust it Off
In the same way you would check the oil level, remove the dipstick, clean it, replace it, and then remove it again to check the oil level.
Step 4: Check the Fluid Level and Condition.
Some automatic transmissions have markings that indicate how much oil is needed. Also, pay attention to the color and smell of the liquid. Red or pink transmission fluid is healthy. If it smells like burned rubber or is black, there may be a problem.
Check Antifreeze and Coolant:
Step 1: Make Sure the Engine has Cooled Down
Do not check the coolant level when the engine is hot. Wait until the engine has cooled down to avoid burns.
Step 2: Locate the Coolant Tank
The coolant reservoir is usually a clear tank with lines indicating the minimum and maximum quantities.
Step 3: Check the Coolant Level
Check the amount of coolant in the pipes. When adding coolant, make sure there are equal parts water and coolant.
Step 4: Check for Leaks
Look for puddles or spots in the engine compartment and under the car that resemble a coolant leak.
Check the Brake Fluid:
Step 1: Locate the Brake Fluid Reservoir
The brake fluid reservoir is usually located in the engine compartment, near the firewall. Please refer to your owner’s guidelines for exact location information.
Step 2: Check the Brake Fluid Level
There will be markings on the reservoir indicating the minimum and maximum water levels. Make sure the brake fluid level is within this range.
Step 3: Check the Condition of the Brake Fluid
Healthy brake fluid is clear or light yellow. If it looks cloudy or black, it is probably dirty and needs to be replaced.
Check Power Steering Fluid:
Step 1: Locate the Power Steering Oil Reservoir
The power steering fluid reservoir is usually located near the engine.
Step 2: Check the Fluid Level
As with other fluid checks, there are lines on the tank that indicate how much fluid is in it. Make sure the fluid level is within this range.
Step 3: Check for Leaks
Check the area around the power steering pump and lines for signs of leakage.
Check the Windshield Washer Fluid:
Step 1: Locate the Windshield Washer Fluid Container
The windshield washer fluid reservoir is usually labeled and located on the side of the car or near the engine.
Step 2: Check the Fluid Level
Check the amount of fluid in the reservoir. If the level is low, add more washer fluid.
Step 3: Check the Washing Machine’s Pipes
Turn on the windshield washer system and spray washer fluid from the nozzles onto the glass. Clean or repair the mouthpiece if necessary.
How to Start Owning a Car?
- Regular Checks: Checking your fluids once a month can help you catch problems early.
- Use the Right Fluids: To keep your car running optimally, make sure you use the fluids provided.
- Fill the Fluid Correctly: Fill the fluid until the correct amount is reached, taking care not to overfill.
- Get Professional Help: If you are unsure how to perform a fluid check or are experiencing a problem, contact a professional mechanic.
- Keep Records: When you check the fluid level and when you add more or make changes, make a note for future reference.
Community:
Good job! You have now performed the most important fluid checks on your car yourself. Checking these important fluids regularly will help your car last longer and drive better. As a new car owner, performing these simple maintenance tasks will not only make driving easier, but you will also learn more about the health of your car. Have fun driving!
FAQs:
1. How often should I check my car’s fluids?
It is recommended that fluid checks be performed at least once a month as part of routine maintenance. Also, check fluids before going on a long trip.
2. Can my car use any type of motor oil?
No, you must use the engine oil recommended in the owner’s manual. Different vehicles may require different oil viscosities and specifications.
3. What should I do if I notice during the inspection that the fluid level is too low?
If the fluid level is low, add the recommended fluid level to the correct level. If you find consistently low levels, it could indicate a leak or other problem. It is recommended to seek professional help.
4. How do I identify brake fluid leaks?
Brake fluid leakage can appear as puddles or stains under the vehicle or around brake parts. If you suspect brake fluid is leaking, seek professional help immediately.
5. Should I wait until the engine has cooled down before checking the coolant?
Yes, it is important to wait until the engine has cooled down before checking the coolant level. Inspecting the engine while it is hot can result in burns and inaccurate readings.