Driving at night can be exciting, but you can only enjoy it if you can see clearly. Headlights are an important part of driving, as they help you see better and keep you safe. Over time, headlights can lose their brightness or burn out, making them harder to see and be seen. In this DIY guide, we’ll discuss the importance of keeping your headlights functioning properly and show you how to easily replace your headlight bulbs.
What Does It Mean for Headlights to Work?
Easy to View and Secure
One of the most important functions of headlights is to illuminate the road ahead so drivers can see clearly. Properly functioning headlights are important for safe driving, especially when it is dark or rainy outside.
Obey the Law
Not only is this important for safety, but it is also the law that headlines should reflect. If your headlights are damaged or dimmed, you could get a traffic fine and endanger your safety and that of others on the road.
Car Appearance
Aside from safety and legal concerns, keeping your headlights in good condition can make your car look better. See better and make your car look better with bright, clear headlights.
Signs of Weak or Damaged Headlights:
For preventative maintenance, you need to know when your headlights are dim or damaged. Feel free to use these flags:
- Loss of Light Output: If you notice your headlights becoming less bright, this is a clear sign that the bulb is about to fail.
- Uneven Lighting: If your headlights have dark spots or uneven lighting, there is something wrong with the filament or the orientation of the bulb.
- Flickering or Rapid Flashing: Flickering or rapidly flashing headlights could indicate a wiring problem or a defective bulb.
- Visible Damage: Inspect the titles for visible damage, such as cracks or water in the frame, which can make them less effective.
What You Need to Replace a Headlight Bulb Yourself:
Before you begin replacing a headlight bulb, make sure you have the following tools and supplies:
- New Headlights: Make sure you purchase the correct replacement bulbs for your model. Check the owner’s manual or go to an auto parts store to make sure it will fit.
- Screwdriver Set: Depending on your car, you may need a screwdriver to operate the headlight system.
- Latex or Nitrile Gloves: Wearing gloves will keep oil and dirt from your hands from transferring to the new lamp and shortening its life.
- Clean Cloth or Paper Towel: To prevent the new lamp from getting on your skin, grasp it with a clean cloth or paper towel.
Now that you have the tools and supplies you need, let’s take a step-by-step look at how to replace your headlights.
How to Replace a Headlight Bulb, Step-by-Step:
Step 1: Find Out the Type of Light Bulb
To find the right type of headlight bulb for your car, check your owner’s manual or call your auto parts store. Halogen lamps, HID lamps (high-intensity discharge), and LED lamps are different types.
Step 2: Drive into the Parking Lot and Turn off the Power
Place your car on a level surface and turn off the engine. For extra safety, you should apply the parking brake.
Step 3: Reach the Headlight Assembly
Depending on the type of car you have, you may need to open the hood or reach the headlight assembly from the back of the headlight housing to access it. See the manual for specific instructions on creating headlines.
Step 4: Remove the Old Light Bulb
Carefully locate the bulb socket on the back of the headlight frame. To remove the fitting from the housing, turn it counterclockwise. To remove the bulb, you may need to press down on the clip or open the latch.
Step 5: Disconnect the Wires
Slowly remove the wiring from the back of the old lamp. Be careful not to damage the wires during this step.
Step 6: Remove the Old Light Bulb
After removing the wires, carefully remove the old bulb from the plug. To remove the bulb, shake it gently while pulling.
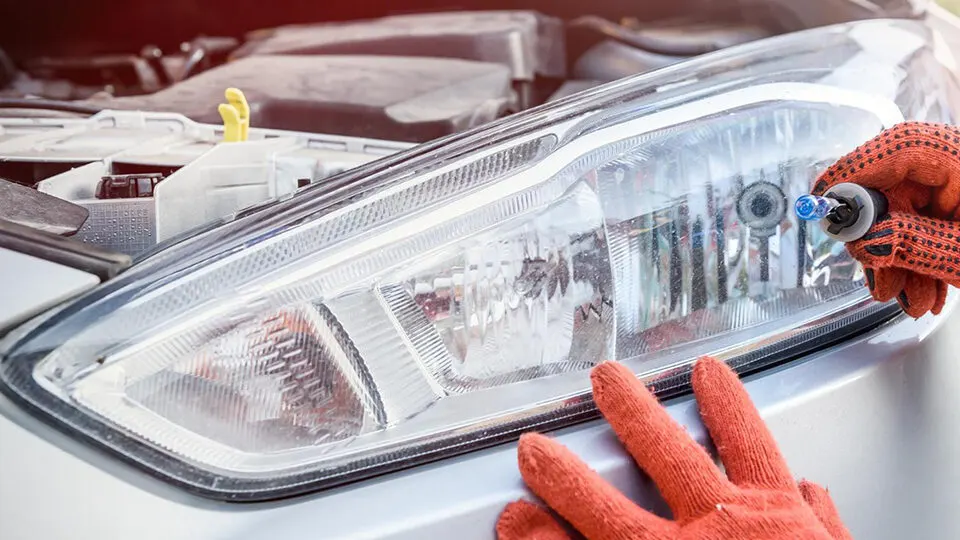
Step 7: Install the New Light Bulb
Use clean gloves or a clean cloth to handle the new bulb to prevent skin oil from getting on it. Before installing a new lamp, make sure that the new lamp is properly inserted into the socket. Make sure the alignment tabs on the lamp fit into the holes (if equipped).
Step 8: Reconnect the Wires
Carefully connect the wiring to the back of the new lamp. Make sure it clicks firmly into place.
Step 9: Place the Lamp Back in the Box
Carefully place the bulb and socket back into the headlight box. To secure the socket in place, turn it clockwise. Make sure the clip or lock is in place (if applicable).
Step 10: Test the New Light Bulb
Open the hood and inspect the new bulb. Make sure that both the high and low beams are working properly. If the new bulb does not turn on, double-check the wiring and make sure the bulb is in the right place.
Step 11: Repeat with the Other Brake Light
To replace both headlights, do the same on the other side. To keep the brightness constant, it is best to replace the lamps in pairs.
Benefits of Replacing Your Own Headlight Bulbs:
Save Costs
You can save on leasing costs if you replace your headlights yourself. Headlight bulbs are not too expensive, and you can replace them yourself if you have the right tools.
Better Security and Visibility
Installing new headlights makes driving safer by providing better visibility of the road. When the lighting improves, you can see obstacles and potential hazards more clearly.
Appearance Improvements
New, bright headlights not only make your car more visible but also make the car look better overall. Clear and well-lit headlights make your car look nice and neat.
Quick and Easy Maintenance
Replacing the headlight is simple and requires no special mechanical skills. If you have the right tools and time, you can do the replacement yourself without going to an auto workshop.
What Not to Do: Common Mistakes
Place Your Bare Hands on the Light Bulb
Do not place your bare hands on the glass part of the new light bulb. Oils from your skin can cause hot spots on the lamp, shortening its lifespan or even causing it to break.
Mixed Lamp Types
Make sure you use the correct lighting for your car. Combining different types of bulbs can lead to uneven lighting and may not work with your car’s electrical system.
No Alignment Seen
Before installing a new lamp, make sure it is properly plugged into the socket. Misalignment can lead to poor beam pattern and reduced visibility.
Conclusion:
Replacing your own headlights is a simple but important maintenance job that can make driving more enjoyable and keep you safe on the road. If you know how to tell if your headlight is broken, make sure you get the necessary tools and follow the step-by-step instructions so you can confidently light the road ahead.
A proactive step to improve the safety, appearance, and overall performance of your car is to regularly inspect and replace your headlights. To make driving more enjoyable, you can buy some tools and do it yourself. Replace your headlights.
Keep in mind that if you are unsure how to perform this maintenance or feel uncomfortable, you should always seek the help of a professional mechanic.